
Many people find difficulty pumping tyres on their bicycle difficult, which is a shame as pumping tyres on a biycle is relatively straightforward. In this guide, we take you through what you need to know. First step is to identify what valve is fitted to your bicycle.
Many Dutch bikes are fitted with Woods Valves. Or, DV – Dunlop Valves as they’re also called. The benefit of these valves is they hold the high pressures required to maintain the tyre’s puncture protection guards, typically 60PSI. However, there’s no guarantee that these valves are fitted to your bike, as the inner tubes may have previously been changed. So first step is to identify what valve is fitted to your bike.
1. Indentify what VALVE is fitted to your bike.
There are 3 types of bicycle valve –
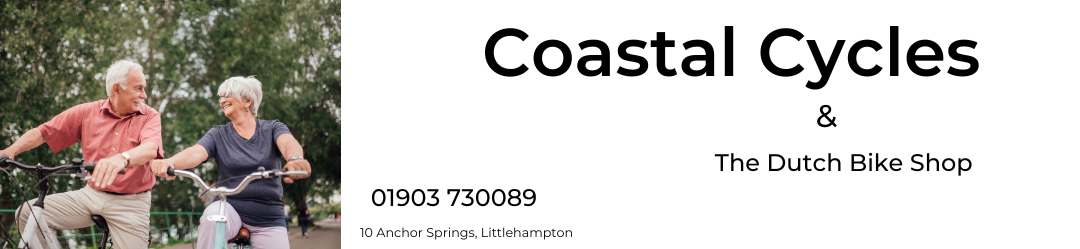
1. Schrader Valve. This is similar to a car valve and is the widdest of the three. Easily recognisable as it has a little pin in the centre.
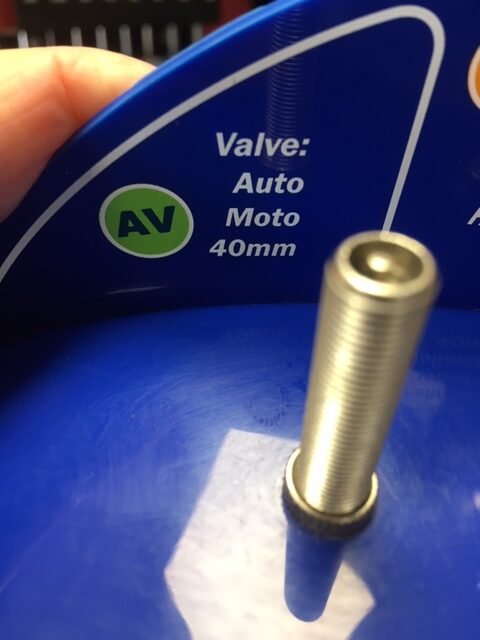
2. Presta Valve. This is the thin valve that’s mostly used on road bikes and has the little bit on the top that you need to screw open prior to pumping the tyres, and remember to screw closed when finished.
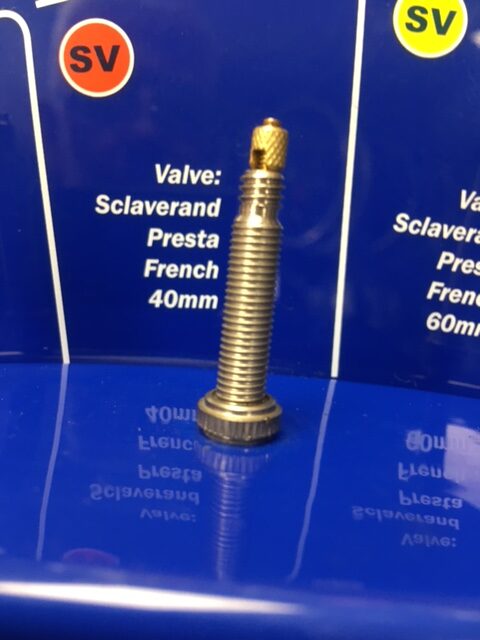
3. Woods Valve. This is the valve that’s fitted to most Dutch bikes, but not all. So you need to check what type of valve is fitted to your bike, remembering that if you’ve purchased a used Dutch bike, the previous owner(s) may have changed the valve when replacing the inner tubes as a result of a puncture etc.
Schrader or Auto Valve – common mountain bikes
Presta Valve – common on racing bikes and some mountain bikes (this is the same diamater valve as a Woods Valve and will use the same narrow setting on your pump.
Woods Valve most common valve fitted to new Dutch bikes. You can unscrew the valve inner core and replace if the valve is leaking. However, you do NOT unscrew the Valve when pumping the tyres.
2. Choose a suitable pump
By far the easiest and most efficient bicycle pump is the Track/Floor pump. This pump is the easiest way to achieve the relatively high tyre pressure that you’ll need to get to. Mostly likely 60psi. These pumps will usually come with a built in pressure guage allowing you to ensure you achieve the correct pressures.
Most bicycle pumps will come with two valve settings – the WIDER of the two setting is for Schrader Valve and the narrower setting for either the Presta or Woods valves which are the same diameter.
Most pumps will have two settings. Choose the narrower of the two for pumping tyres that have either Woods or Presta Valves fitted. Most Dutch bikes will have Woods valves fitted.
A quick note on pumps – if you buy something cheap from a non-cycling outlet, bargain discount shop etc, expect lousy results. There’s a reason these pumps are cheap. Expect to pay in the UK around £25-£35 for a track pump, significantly more for a high pressure hand pump. Our advice is always to buy from a good quality independent bike shop and ask them to show you how it works, prior to leaving the shop.
3. Using a Valve Adaptor can make life easier
You don’t have to use a valve adaptor, but a common problem with Woods Valves is that the thread isn’t long enough for the pump to make a good seal over it. You may find your pump hanging off the end of the valve, which makes it difficult to pump.
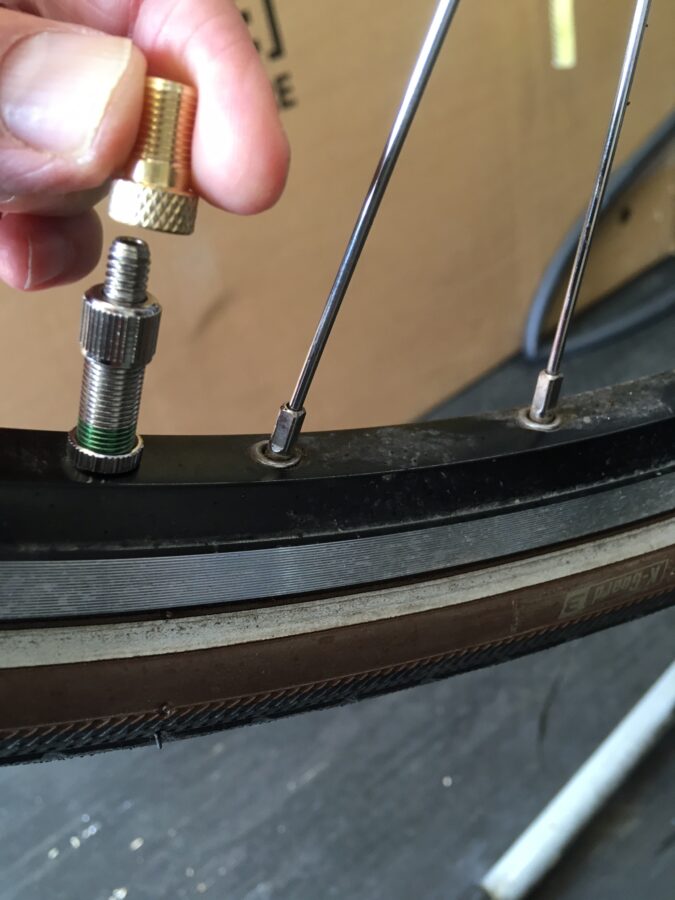
Valve Adaptors can be purchased online from a variety of sources for a few pounds and many bikes will stock them. When you purchase your new pump, you may find one included. Usually plastic, as opposed to brass.
Simply screw on your valve adaptor over the valve and this turns it into a Schrader/Car valve and you can now pump using the Schrader/Car Valve setting on your pump. Ideal, if you’re using a car foot pump.
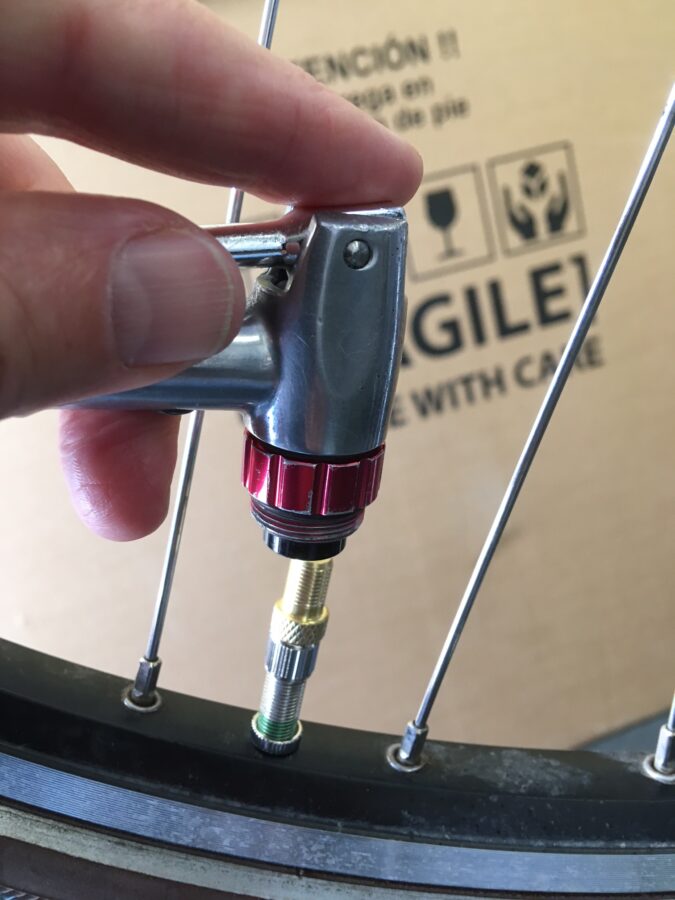
Place your pump’s nozel over the valve adaptor – or follow the instructions provided by your pump’s manufacturer if different from the above.
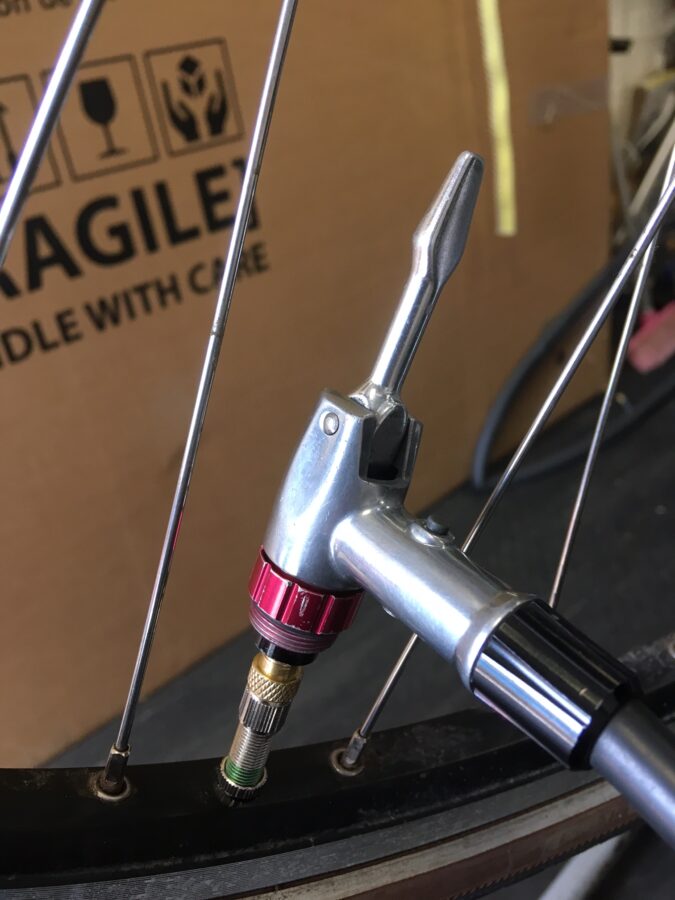
The Nozel is then ‘locked’ on to the valve by pulling up the lever into lock position and you’re ready to pump your tyres.
4. Check what Tyre Pressure your tyre’s take.
Your recommended tyre pressure will be printed/embossed somewhere on the side of your tyre wall. You will need to check this prior to pumping.
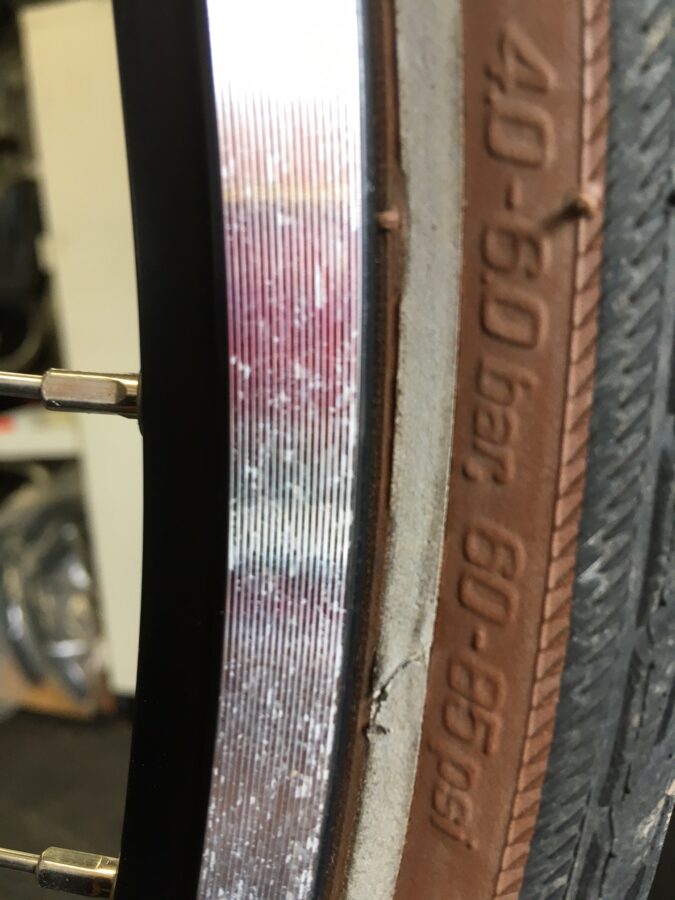
The manufacturer’s recommended tyre pressure on the above example is 60-85psi. We’d recommend (unless you’re riding a racing bike) to go with 60psi. Some tyres on Dutch bikes will only require 50psi or even 40psi, but you will need to check what the tyre pressure is to ensure you don’t under or over-inflate.
If you’re tyres are relatively old and have evidence of cracking on the side of your tyre, then don’t pump to the maximum advised pressure. Instead take off a percentage of PSI – for example, if the recommended is 60psi and the tyre is old and walls showing cracking/deterioration go with something like 50 or 55psi. Cracking sidewalls are often caused by under-inflation of the bike’s tyres. Or failure to maintain the correct pressures. Tyres are always losing air! You need to check and pump your tyres regularly. Oddly, the less you ride your bike, the more pressures you lose. So riding regularly can mantain better tyre pressures.
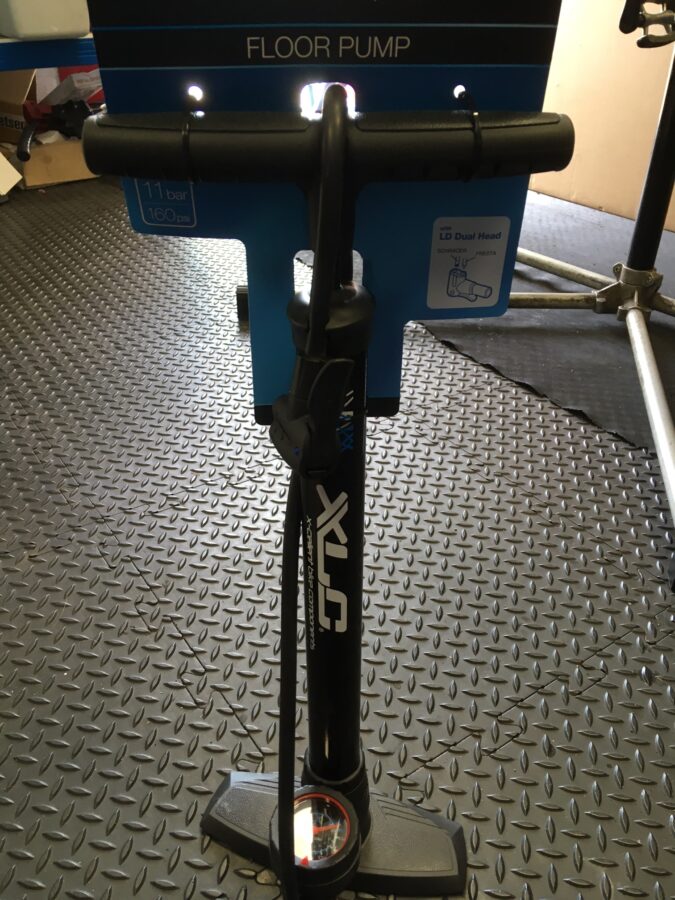
A Track/Floor pump with a guage on it. Ideal for pumping the tyres on a Dutch bike or any other bike. If you’re buying a hand pump, one that can fit to your bike, you’ll need to make sure it’s capable of achieving higher pressures. Most of the cheap hand pumps won’t be able to achieve a high pressure, despite the claims made on the packaging…
5. Watch our YouTube Video if still in doubt.
Some years ago, we made a youtube video covering pumping tyres on a Dutch bike. If you’re still unsure, do watch it below.